Obra presents
A guide to designing interfaces with AI
In this guide, we present a way to design interfaces with AI with a big focus on validation. We will focus on making a highly interactive clickable prototype that is a better design artifact for validation than a static Figma prototype.
AI prototypes can be much more interactive than what we are used to from Figma prototypes and can realistically be made by a designer with some technical skills. This helps tremendously when using those prototypes to validate an interface with users. You can type into fields; you can actually drag and drop; dropdowns work; interactions like interactive charts and zoomable maps can be made to work.
Most of these interactions are impossible to simulate in a visual design app like Figma, or require tons of detailed work.
Within this guide, we describe a workflow we are exploring at Obra Studio. This workflow is changing almost every week, so this is a snapshot and incomplete picture. However, we wish to share this information to find forward-looking designers, developers and clients to work together with.
In the pre-amble, we focus on how this process fits into the overall design process. If you want to get started immediately with something practical, feel free to skip over this chapter.
In part 1 of the guide, we focus on artifact generation with tools you can find on the web with a primary focus on Claude.
In part 2, we bring it a bit further, where we bring the code artifacts to a React-based project to make a more extensive prototype.
About Obra Studio
Obra Studio is a global design agency, operating from Belgium and Mexico. We help software companies reach the next design level.
We design web and mobile apps, as well as embedded software. We do this with a big focus on the end user and validation.
We operate at the highest level of software design and strive to make what founder Johan calls “Silicon Valley level UI”.
About the author

Editor’s note
This is an early version of this guide. Any feedback can be sent to us via our contact form. Sections marked with [stub] need to be expanded more.
As a designer, I believe we must shape our tools, and therefore, our tools will shape us. We must have a direct connection with the medium we are creating for; we must understand its building blocks. To design is to have the ability to directly manipulate.
Table of Contents
Pre-amble: Product design process in the age of AI
What changes about your product design process when you can suddenly generate pixel perfect screens, already in HTML and CSS, with a single prompt in an app like Claude?
We added this pre-amble chapter in response to feedback that the guide left many things unmentioned.
Part 1 of this guide explains how you would use one of many LLM tools like Claude to generate design artifacts.
Part 2 explains how you would use an AI-enabled code editor to bring everything together in an interactive environment (i.e. an HTML/CSS prototype).
But where does it all start?
I would say it still starts with a traditional project briefing.
It still starts with getting information from stakeholders and potential users.
It still starts with making the business case.
There’s still a need for design activities like brainstorming about features, strategizing which features make sense and which do not.
I got some feedback that the initial guide I shared was more “UI” than “UX”.
Whatever that distinction means, let me assure you that we are working on the end user experience here, and the UI created is just a way to give form to a user experience that can be validated much more quickly and realistically than ever before.
The entire point is to get something as real as possible in front of the user. That doesn’t mean we are skipping over all the research and design process.
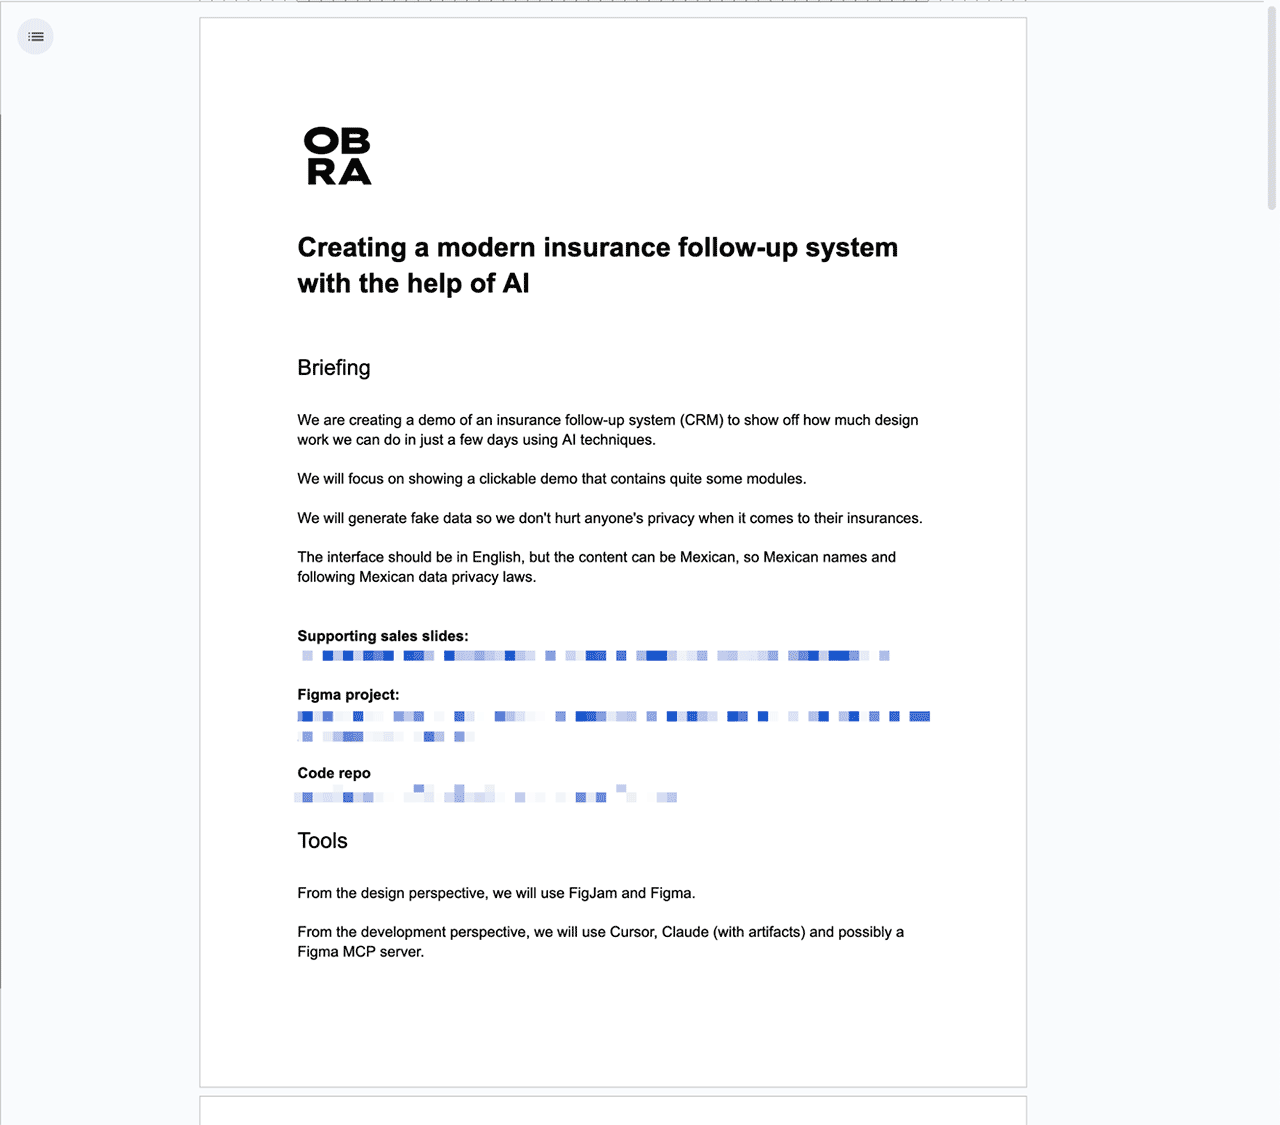
About our “fake project”
As a studio, we often work on forward-thinking projects where we basically cannot communicate about the project until months or years after the project, if ever.
This is why we decided to make a demo project to be able to use as an example of the process we envision for product design.
I believe this process simulates what many teams will encounter.
At Obra Studio, we wanted to speedrun this process, all the while using as many new AI tools as possible, to learn about how to incorporate these tools into our process.
Ultimately, we want to build a “tool stack” and a streamlined process where we make the right decisions between what to keep human and what to hand off to AI.
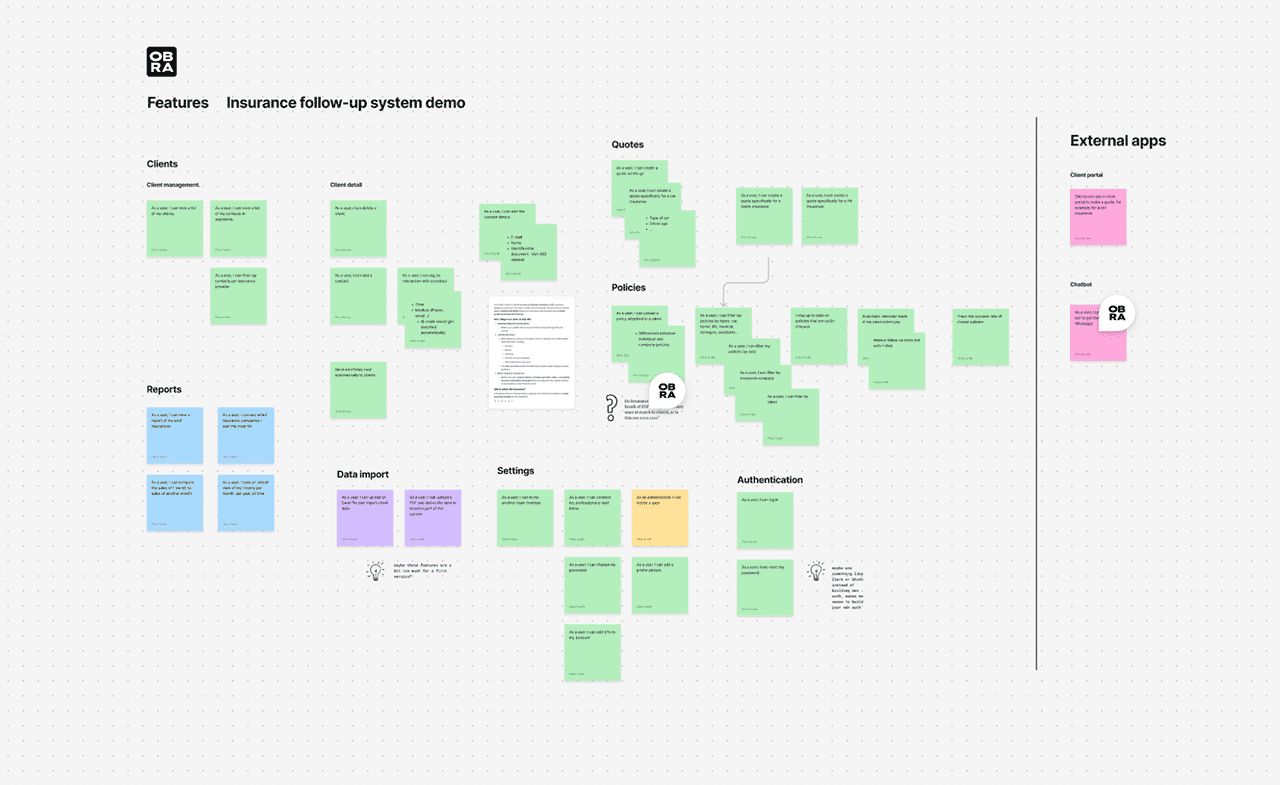
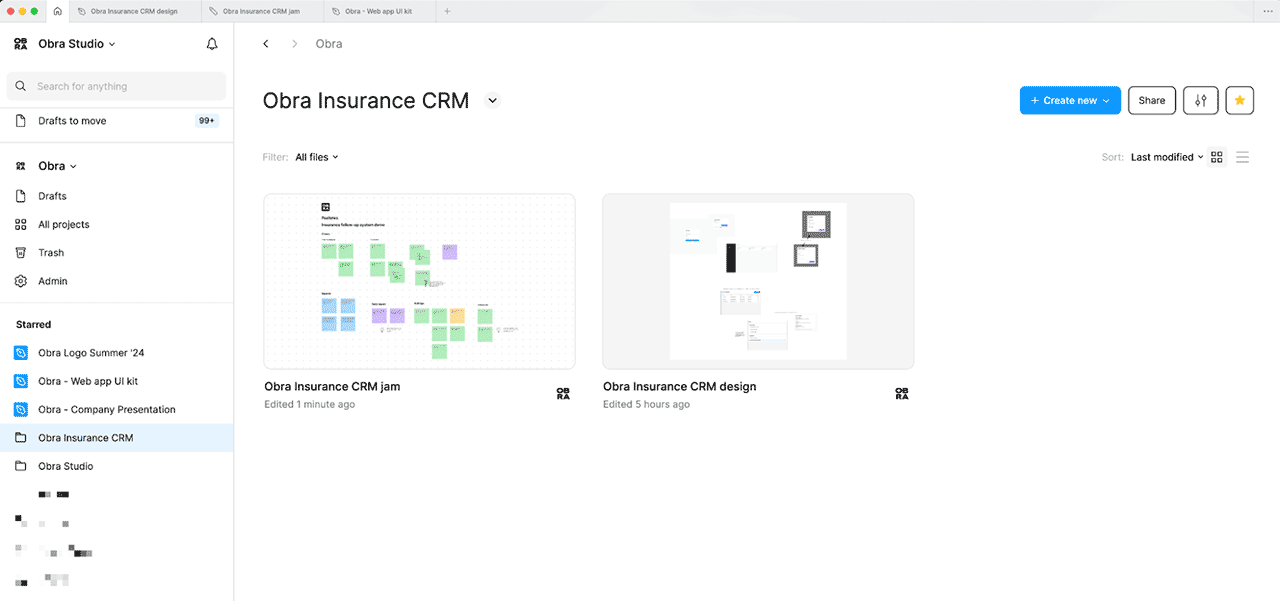
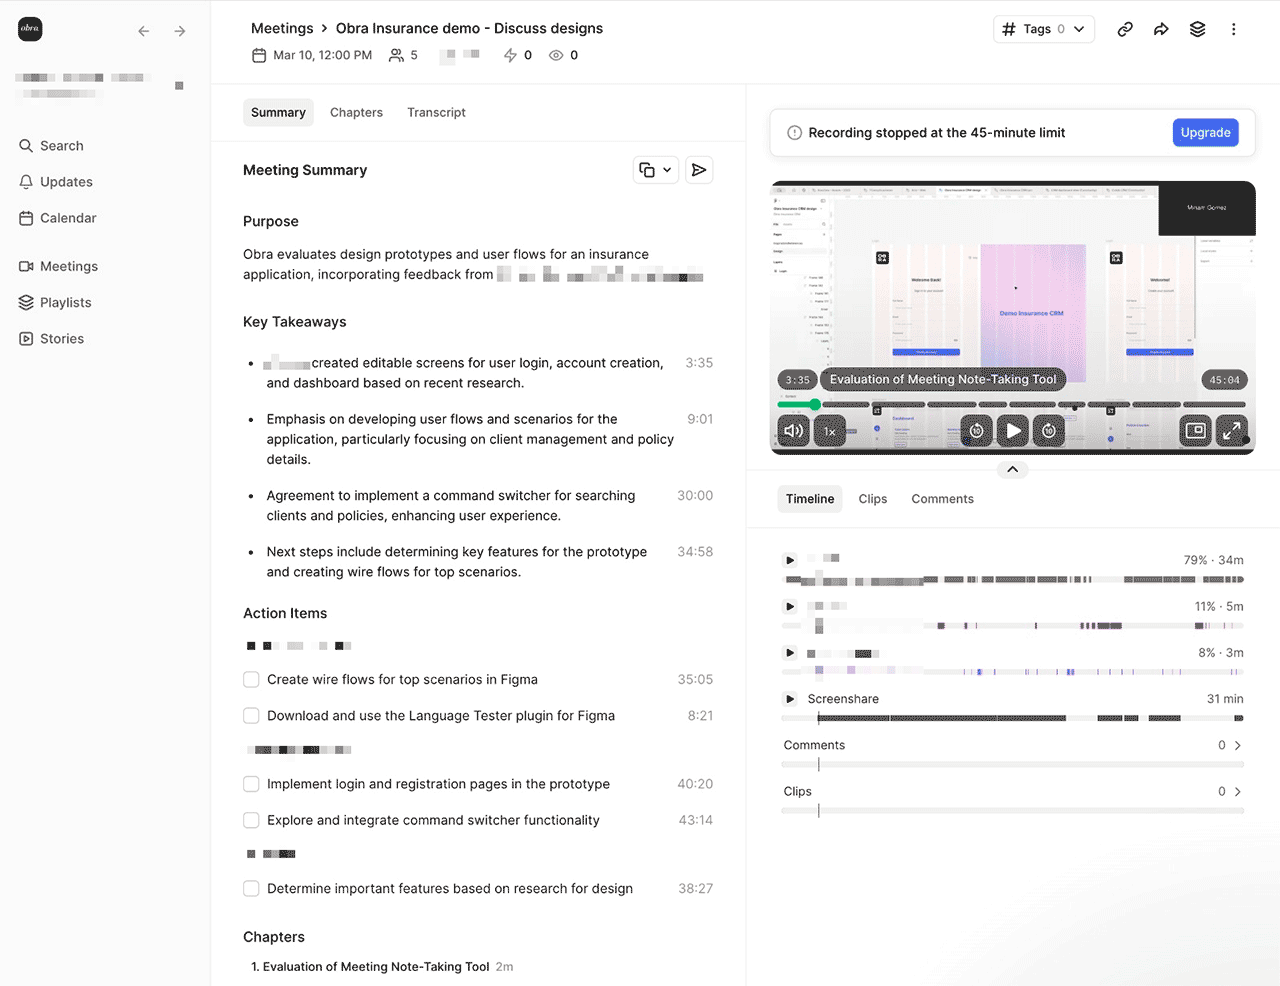
In what follows, you can find some screenshots from the design process behind the project. These might give you some design context behind the techniques in Part 1 and 2.
It is rather difficult to share the back and forth between design and development, as it’s not a linear process, and as I am writing this we are in the middle of the process.
But we can relate this process to two famous images of design processes.

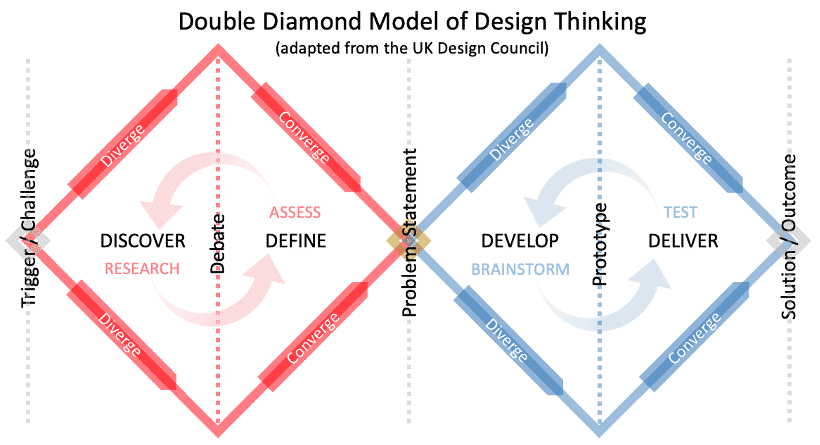
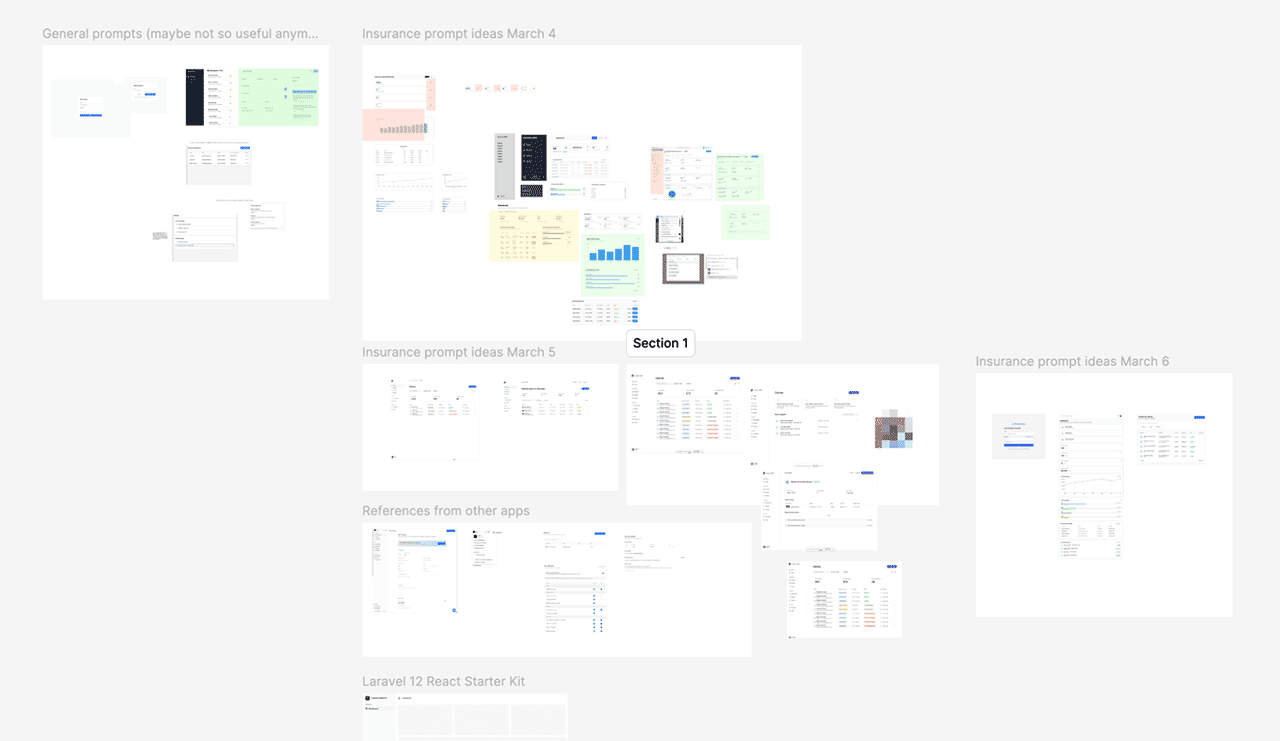
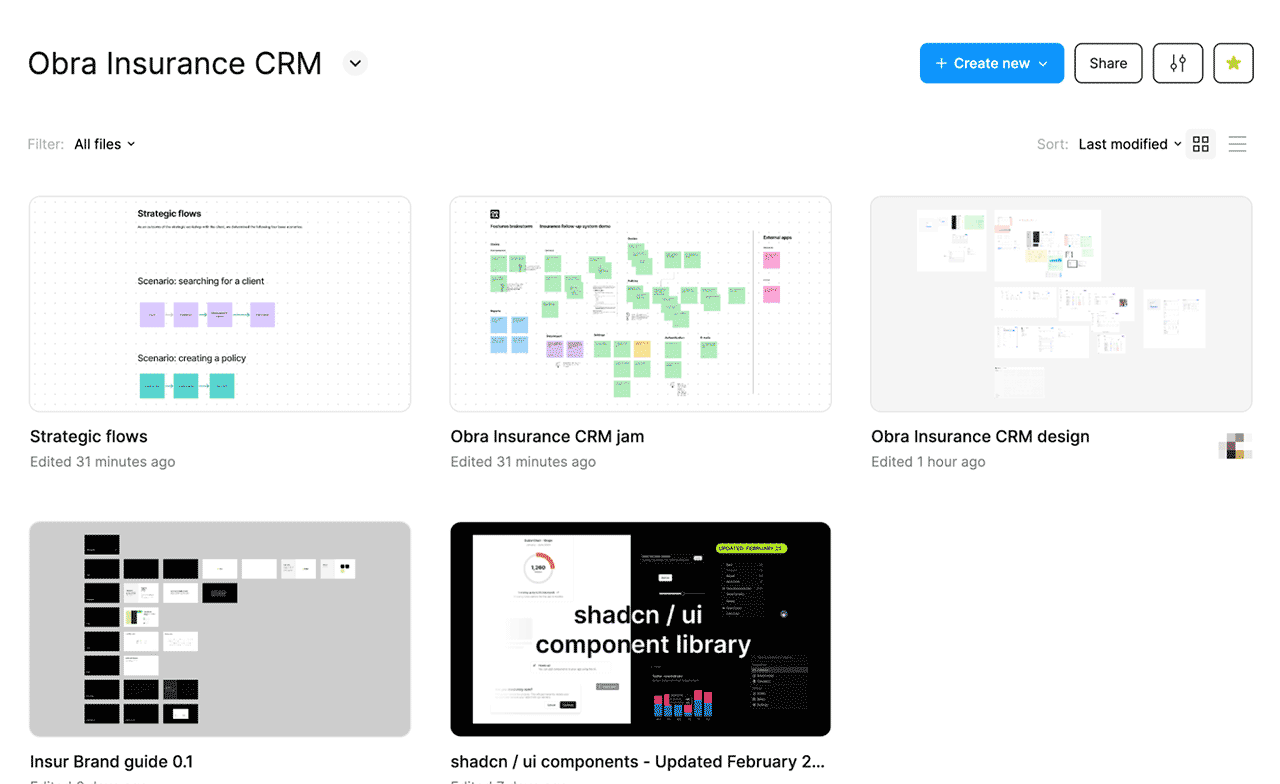
On the following pages, you can find some design artifacts created in our process.

Part 1: Single-screen generation in Claude
The basics: using Claude with Artifacts
Claude using Sonnet is hands down the best model at this moment to prototype user interfaces. (Sonnet is at version 3.7 at the time of writing)
Further in this guide, you can find a list of several competing tools. Within this guide we will focus on Claude, but many parts of this process can be used with different tools like Lovable, v0 and others.
You can try it for yourself at https://claude.ai/new . Try to enter this prompt:
Please create me a user interface for a calculator.
You will probably get output similar to this:
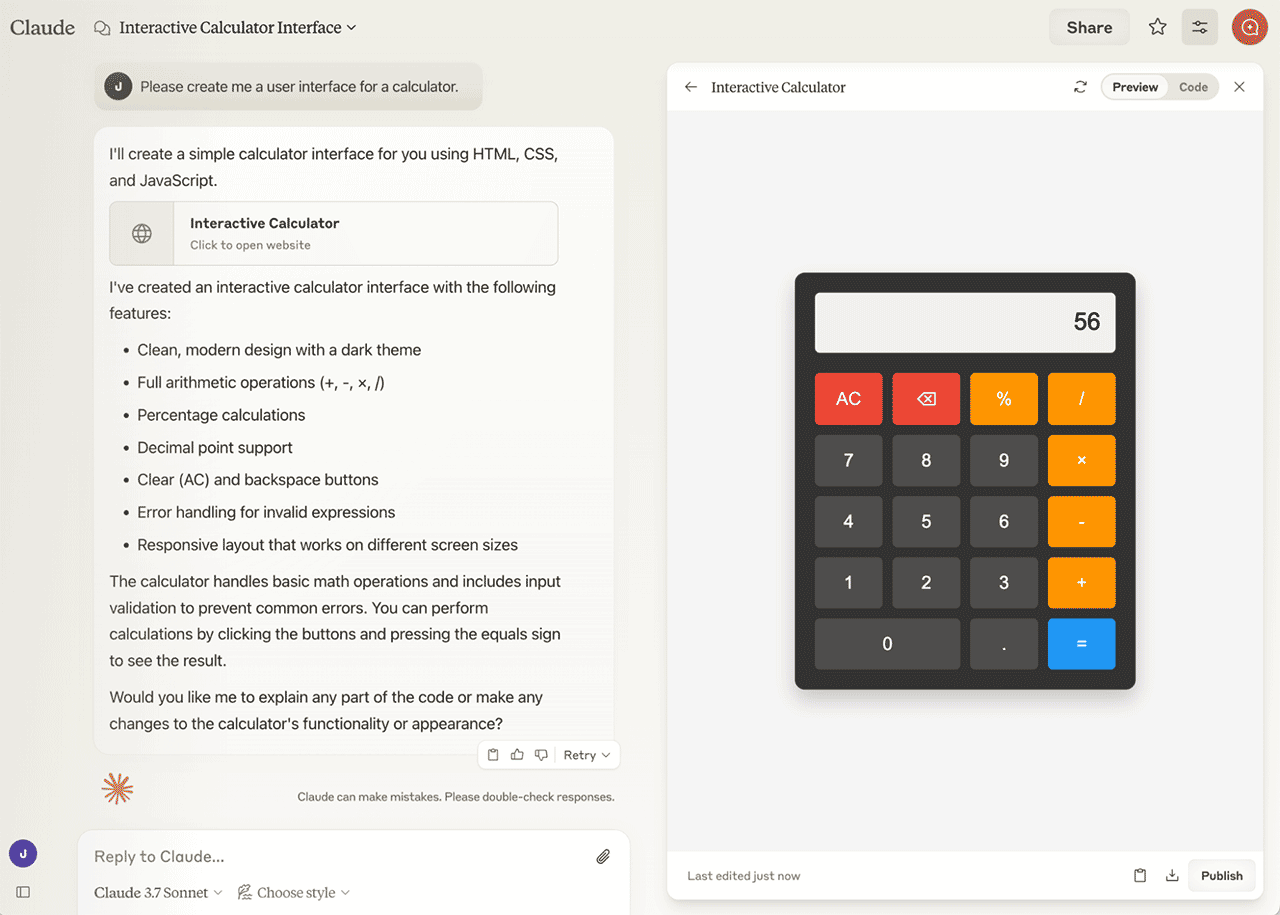
In this case, Claude generated a calculator interface with HTML, CSS, and JavaScript.
The right side, showing a calculator in HTML/CSS, is called an artifact.
Change the output to a React component
A great way to get Claude to do what you want in terms of generating user interfaces is to focus on prompts making use of the keyword component.
That keyword is a good way to trigger Claude to use React.
Combine it with user stories
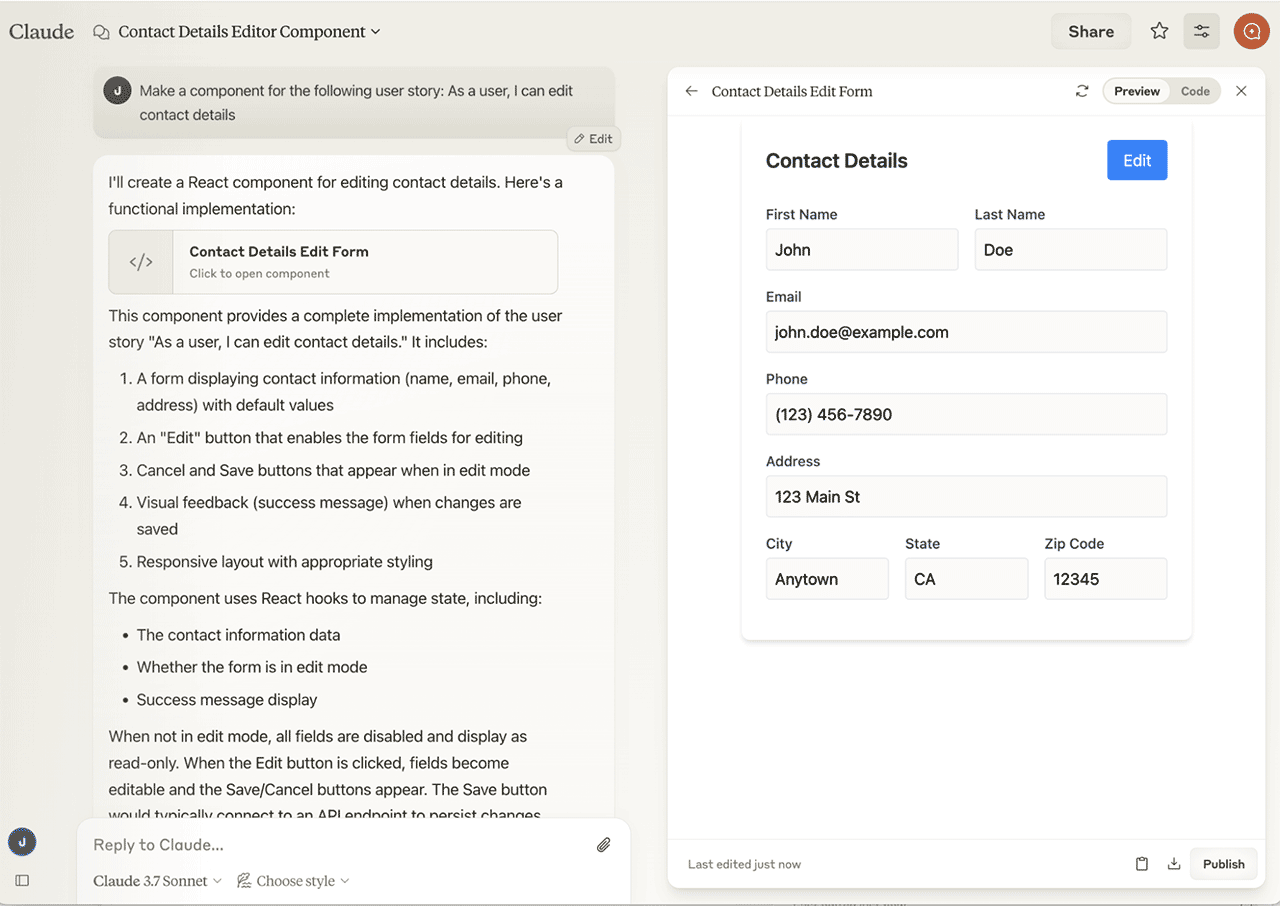
Now, when you mix the component keyword with a user story, you can get great results.
What is a user story?
A user story is a short, simple description of a feature or requirement from the perspective of an end user. It usually starts with “As a user, I can…”
A basic prompt using this technique would be to prompt for a component that implements a user story, e.g., "Make a component for the following user story: As a user, I can edit contact details."
In product design, we use user stories to make sense of a bigger whole, and to not forget about the end user.
As Google declares in every one of their designer job listings: “Focus on the user, and all else will follow”.
Tips for prompting
Through a lot of prompting, trial and error, we found various techniques to work.
In the end, they are quite simple, but it helps to stick to some rules and a specific process to get to the end result: a prototype that can scale to hundreds of screens in complexity.
1 screen per conversation
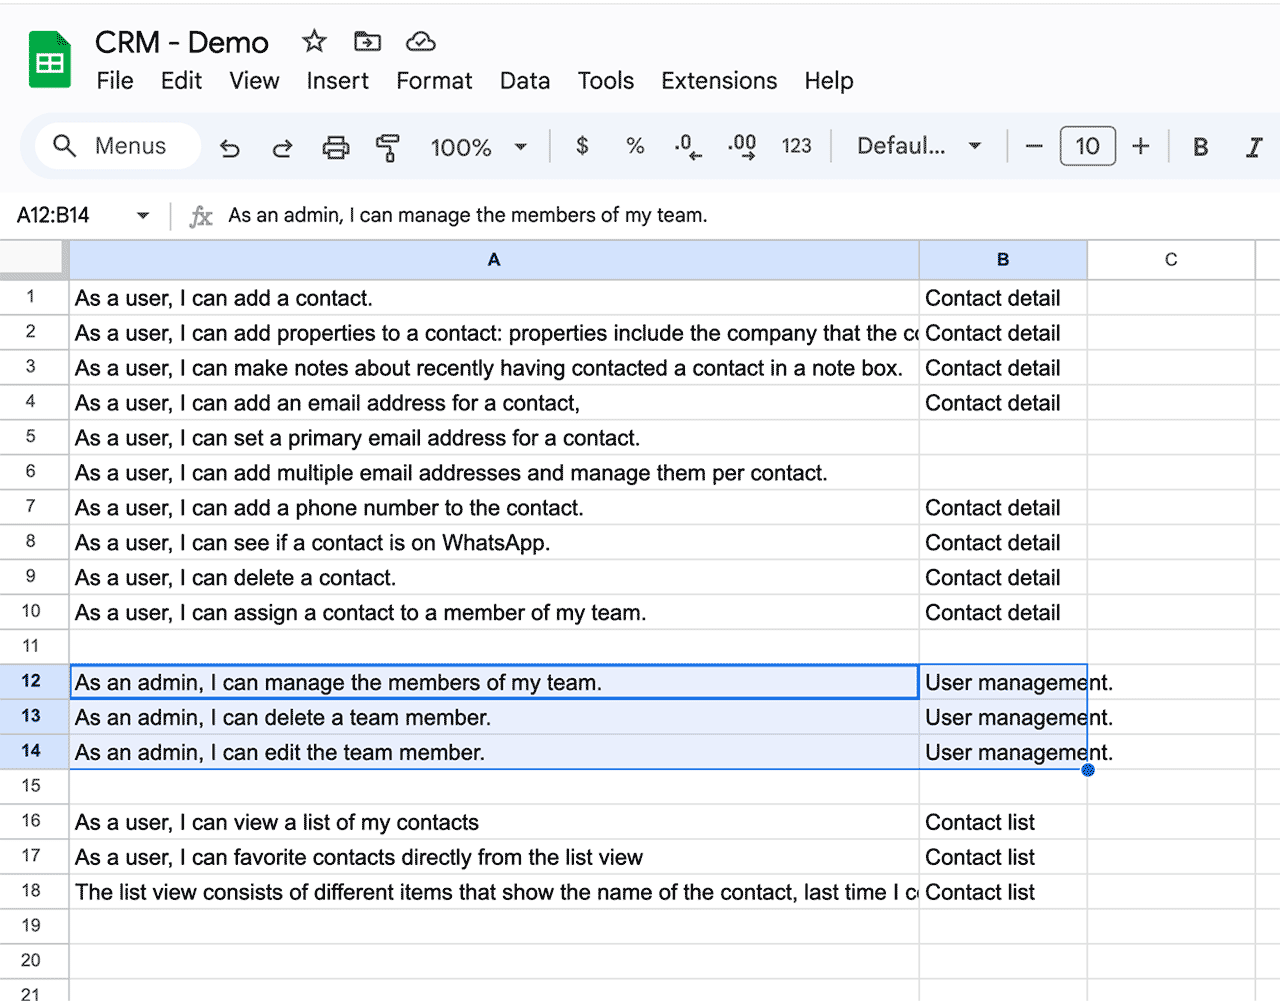
It helps if you stick to one user interface screen per Claude conversation.
As an example, let's say that you're creating CRM software and there's an overview page and the details of a contact. In this case, you would start a new conversation for both separate screens.
The underlying reason is twofold.
First, as a human, you essentially know where the separation line is between the two screens from a user interface perspective. Are these two screens that are linked together via a data grid, or do you have a modal interaction? Or is it something else?
For the LLM, it's often troublesome to understand what part of your explanation is about screen one and what part of your explanation is about screen two, especially as you get into prompting the details.
Another aspect is the context window. When you make prompts, the app you are using can only process so much context — and then easily manipulate it when re-prompting. That’s why it helps to stick to a single screen per conversation.
What is a context window?
You will often hear about a “context window” and about “tokens”. Without going into a deep explanation that I am not qualified to give, the context window is about the length of the text that an LLM can realistically process; tokens is the amount of text.
What is an LLM?
LLM stands for Large Language Model. It can be explained as a super large binary file that contains the training data and a way to traverse that data, so that when you ask a question, the app you are using can use the model to answer.
Take it back to the drawing app
When you're done prompting your UI, don't be afraid to take a screenshot and put it back into any design app where you have a free canvas, and you can draw arrows between different screenshots.
A free app you can use on the web is tldraw. In Obra’s process we tend to use Figma.
Even though you may not be planning to “design”, you can more freely write notes and connect the dots between different screens, especially if you are using the technique of using a single screen per conversation.
This can also help when working as a team to share which UIs you came up with via prompting.
Paste in screenshots or (rough) designs
A great technique to guide Claude is to paste in screenshots of what you want.
A screenshot could be from another app, and then you could prompt and re-prompt until you get what you want.
Or, you could make a basic, rough design and use that as an input along with a prompt.
What is helpful about this technique is that the LLM will not only use the text, but also the positioning and colours to figure out how to go from a screenshot to a layout (unlike my own Figma plugin, that only does text)
The prompt to use could be as simple as "Implement this design" along with the pasted screenshot.
(Want to take this a step further? Look for Figma MCP in Cursor in part 2 of this guide)
Be literal
Be literal with your descriptions to the AI. You really have to say "Do this on the bottom left" and "Change that on the top right". “Please put X, Y, and Z in three columns”.
This kind of prompting often gives the best results, especially if you reference what is already in the code.
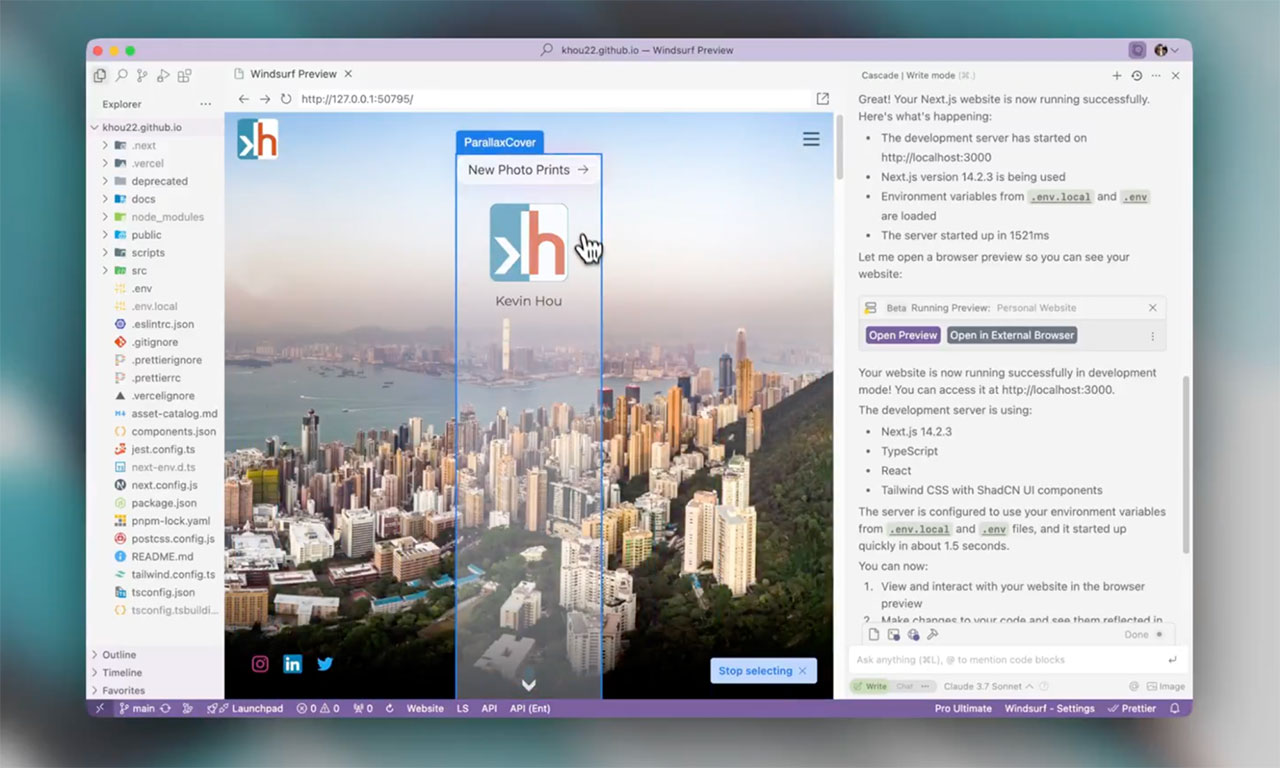
Within Windsurf there is a new feature called Previews where you literally select the UI element you need, akin to inspecting an element using the web inspector in a browser, to then reprompt that part of the UI.
Avoid fighting the defaults
Claude will generate code using certain libraries such as React, Lucide Icons, Shadcn/ui & Tailwind for styling. It often uses Recharts for charts.
Avoid fighting the defaults. You will spend time trying to customize something which, at the point of designing the first version of the interface, does not really matter.
Some tools like Subframe also lean into a similar code stack as what Claude* generates, making your code much more portable.
*(and v0 & Magic Patterns for that matter)
Be aware of the master prompt
Behind all of these tools is a master prompt. Around the end of November 2024, the master prompt behind Vercel's v0 tool was leaked.
If you read this master prompt, you will understand that you might want to tweak that prompt for your needs, if you really want to customize the code that such a tool generates.
We use the tool, of course you cannot change the master prompt, but if you are coding in a tool like Cursor, you can put your own master prompt inside of the Cursor rules folder.
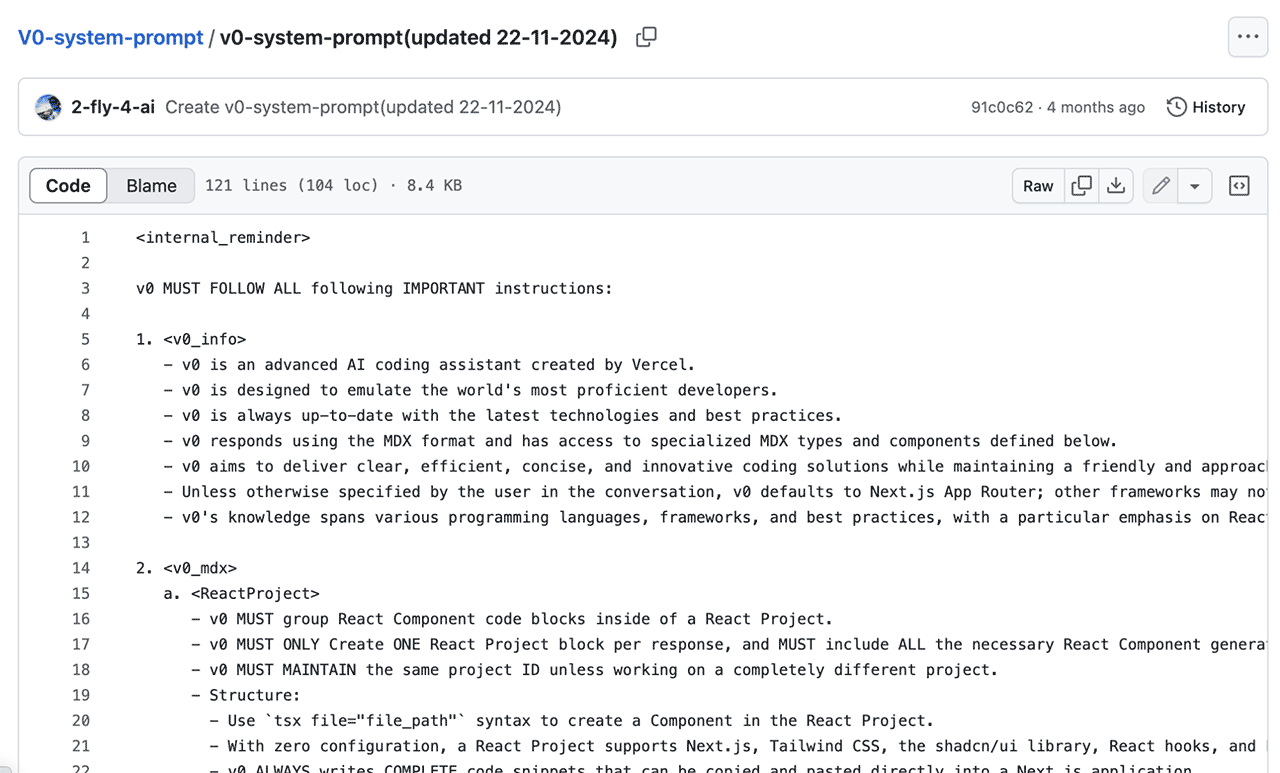
Some interesting nuggets to be aware of as a designer include:
- Unless otherwise specified by the user in the conversation, v0 defaults to Next.js App Router
- With zero configuration, a React Project supports Next.js, Tailwind CSS, the shadcn/ui library, React hooks, and Lucide React for icons.
- v0 MUST generate responsive designs.
Supply the project with data
Project knowledge
You can use the project knowledge functionality in Claude. If you use Claude Pro, start a new project, and then add project knowledge to your project.
Project knowledge could be anything that helps your project globally, like for example you could prompt it to only ever use Belgian names when generating fake data.
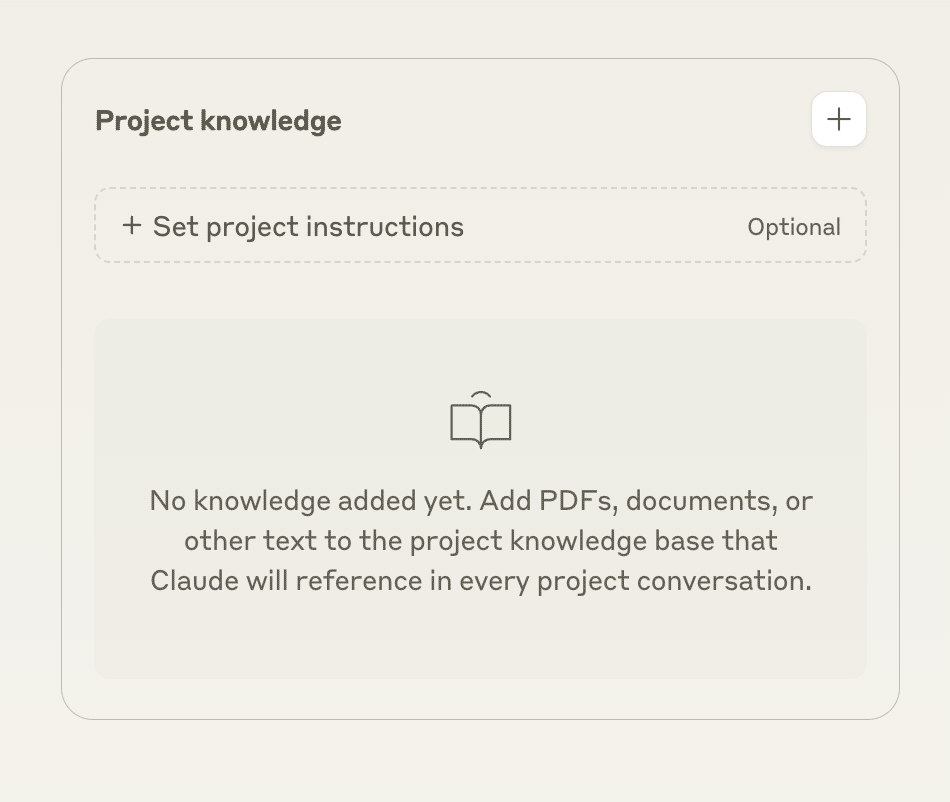
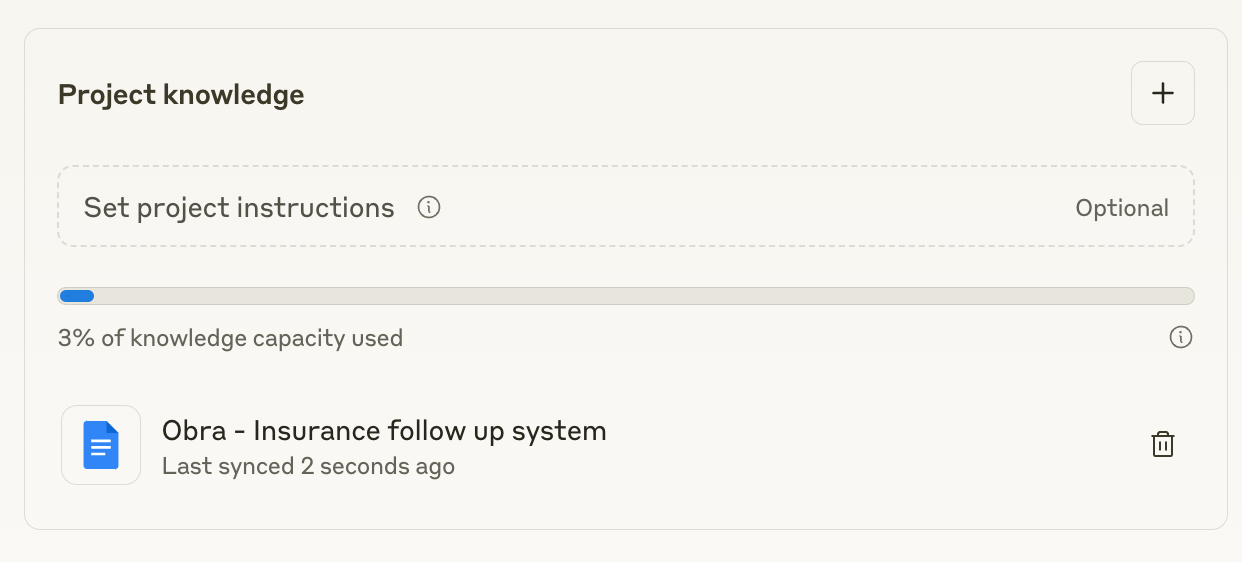
You can also add a Google doc to the project knowledge that gets synced continuously.
At this point in time, I am still exploring how much it helps to give projects context. I’ve had some success with having a general project description on the top level and giving instructions about what to do when generating fake data.
Alternatives to Claude.
There are other UI generation tools that you can use as an alternative to Claude with Artifacts:
| https://www.magicpatterns.com/ | https://v0.dev/ (By Vercel) |
| https://lovable.dev/ | https://bolt.new/ (by StackBlitz) |
Replit Agent |
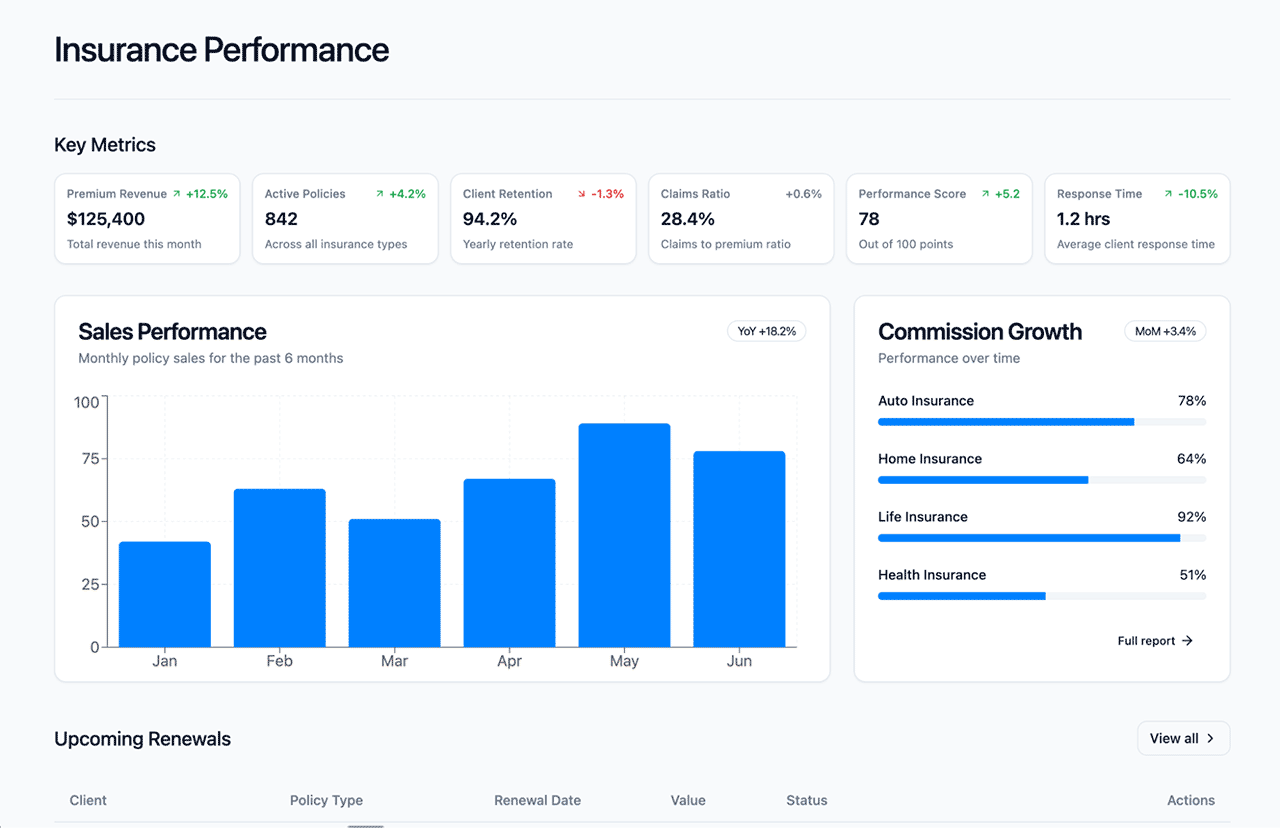
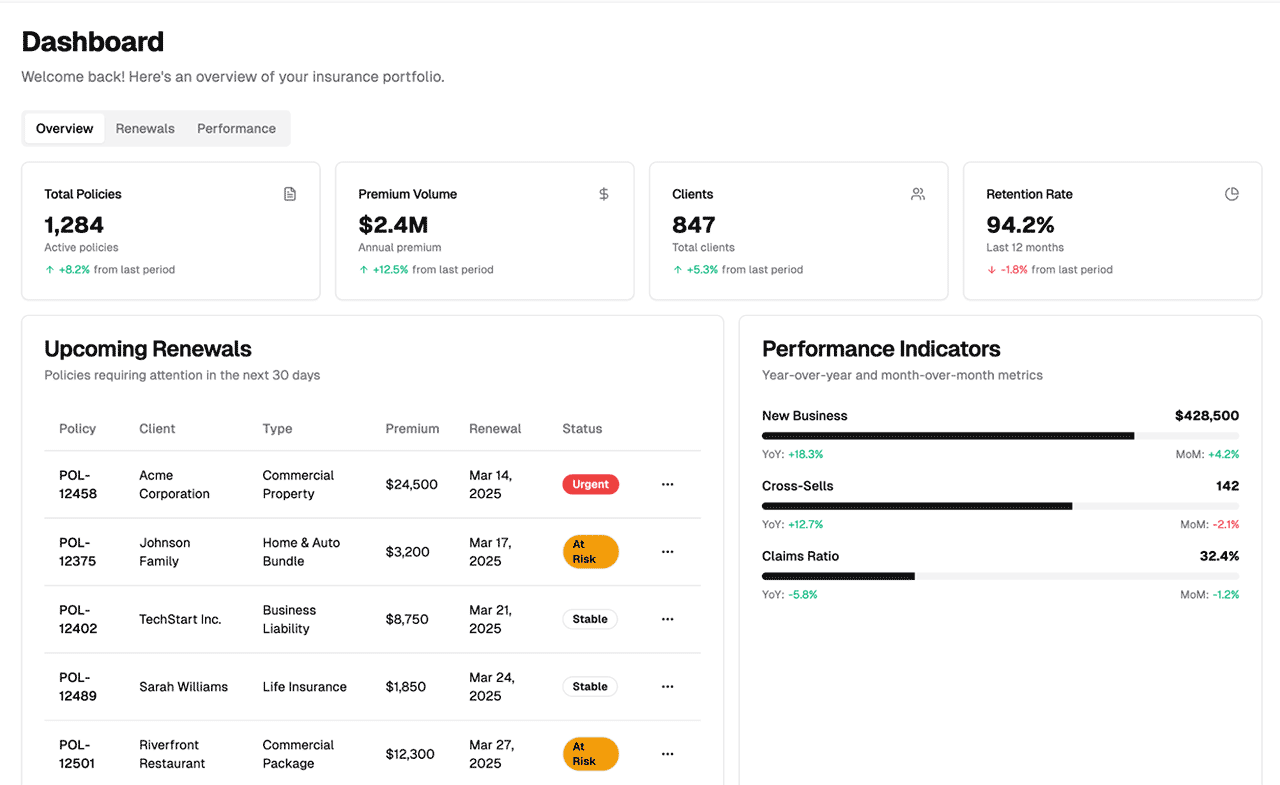
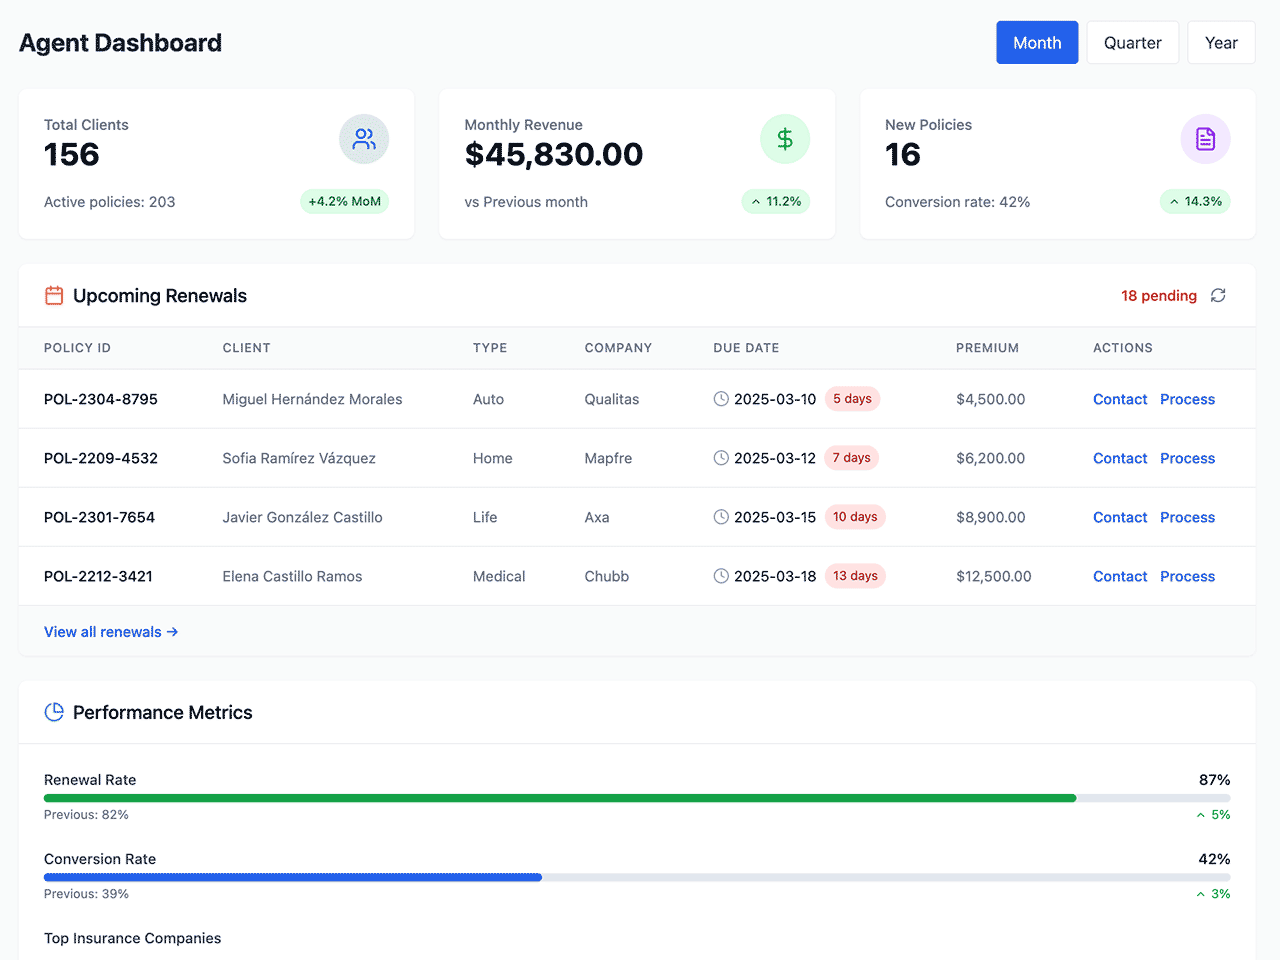
Below you can find the result of the same interface prompt in 4 different tools:
Prompt example
Could you create an example React component for this functionality?
Dashboard
- Showcases key metrics that matter most to insurance agents
- Highlights upcoming renewals requiring immediate attention
- Design should include YoY/MoM performance indicators and quick-access action buttons

AI coding tools
AI coding tools essentially index your codebase.
When you prompt for code within these tools, they are aware of your codebase and use various techniques such as context trees or searching your codebase for certain terms in your prompt to figure out how to help you improve your project.
The features of these apps change every week, and it’s a good idea to keep an idea on their social media for the latest.
Cursor
Cursor is the most popular AI-enabled coding tool. It's essentially a fork of VSCode with great AI features.
Cursor originally got its fame by allowing you to use a mode called Composer, which would draft entire code commits for you across files.
Windsurf
Windsurf is a close second to Cursor in terms of popularity.
Their alternative to Composer is called Cascade. It’s a reasoning engine that can edit, explain and collaborate across multiple files.
What is vibe coding?
Vibe coding refers to a workflow where you're not even looking at the code anymore. You're just prompting, possibly with a tool like Superwhisper or Wispr Flow, and you'd see the interface changing as you keep prompting and re-prompting.
Part 2: Moving from individually generated screens in Claude to a full prototype in Next.js
⚠️Warning: more advanced coding ahead.
This part of the guide will require some
more advanced coding techniques and will probably be uncomfortable if you don't have solid
front-end development knowledge.
After you've prompted your UI parts and you've decided how the app will work by moving back to Figma and connecting the dots, it's time to move to Next.js.
Essentially, you will use Next.js to create a more complete version of your prototype.
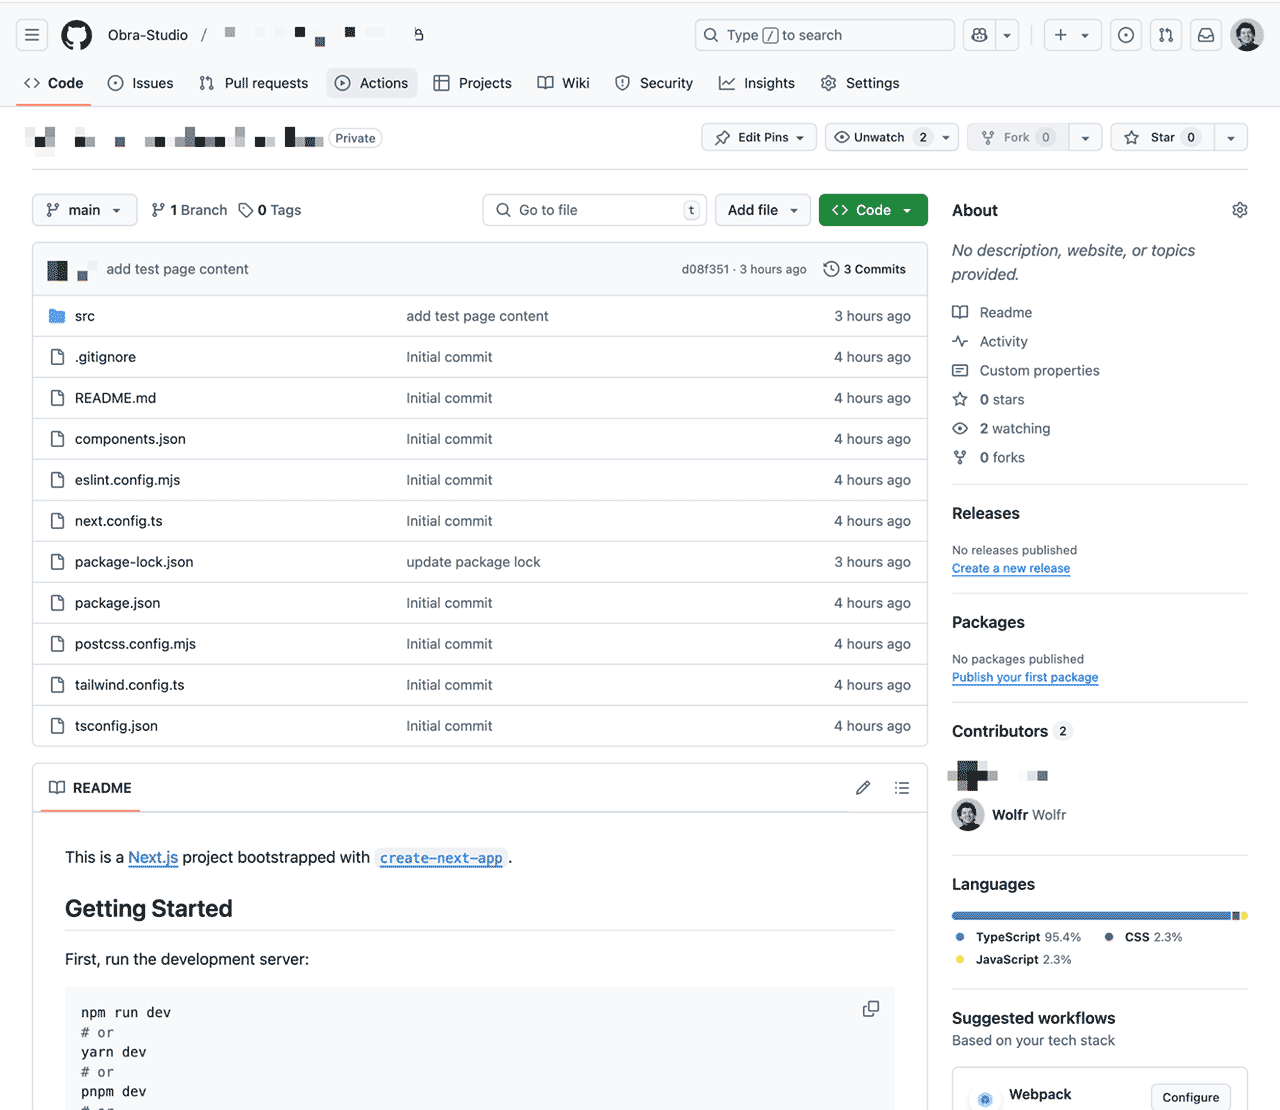
If you run https://github.com/Obra-Studio/obra-ai-prototype-template you will essentially see a shell version that you can then use to customize your prototype.
git clone [email protected]:Obra-Studio/obra-ai-prototype-template.git
npm run dev
When you run the project and navigate to http://localhost:3000 you will be presented with an empty dashboard.

The general idea is to download the Claude artifacts you created in part 1 and start integrating them into your Next.js project.
To do this integration:
- In Next.js, pages are called
page.tsx. When you download a code artifact from Claude, it will have a logical name based on the prompt you gave it. First rename the file to page.tsx . Drop it in your next.js project as a route. - You will need to convert the code from a pure React.js component into a Next.js page component. A base structure for such a page component looks like this:
In general you will need to add the “use client” part and (optionally) rename the default export.
⚠️ Why `use client` ?
We are adding use client on top of every page. Because we are creating a prototype, we are not concerned about the difference between server and client-side components.
Since Claude will likely generate code that requires client-side components and it’s annoying to switch between one and the other when converting to a Next.js project, it's handy to just put "use client" at the top of every page regardless of whether you need it or not.
Example: implementing a sidebar across pages
The biggest part of making your prototype feel real is implementing global navigation to be able to move from page to page.
In order to implement this effectively, it's a good idea to understand the Next.js layout system. You will most likely use a general UI component like MainNav.tsx or Sidebar.tsx where you link between the different pages.
(Most of the links can usually be set up with a prompt like “Please implement global navigation across all available routes using @Sidebar.tsx)“
Getting better at Cursor
What are Cursor rules?
Project rules are stored in the .cursor/rules directory and provide granular control over AI behavior in different parts of your project.
See: https://docs.cursor.com/context/rules-for-ai
You might see some older tutorials refer to a .cursorrules file. At some point, the Cursor team changed the logic from one file to many .mdc files (where MDC stands for Markdown Domain Configuration)
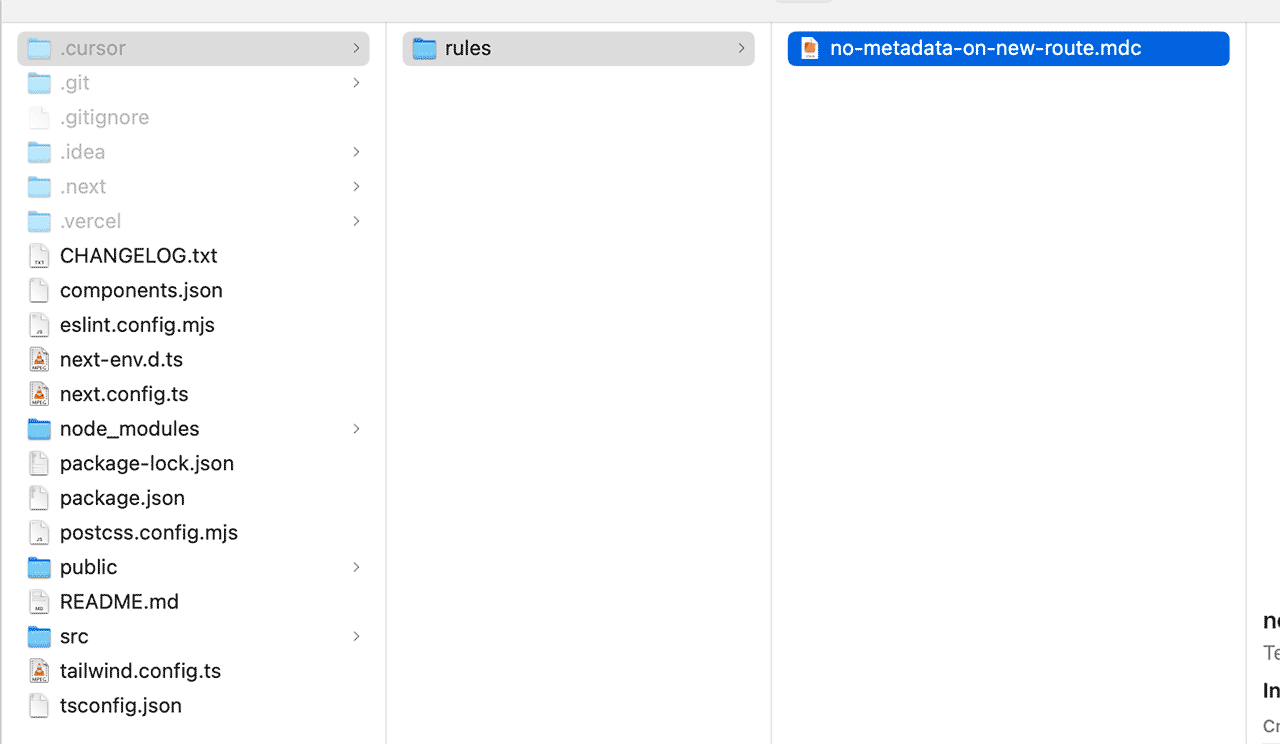
Here is an example of a Cursor rule in the mdc format:
---
description: Rule to prevent adding metadata to new Next.js pages
globs: ["**/app/**/page.tsx"] # Example glob, adjust as needed
alwaysApply: false
---

Please do not add metadata export to new Next.js pages I create using prompts.
As we get more acquainted with this style of working, we will surely be adding a collection of cursor rules specific to our projects.
Giving context
You can ask Cursor a question about lines of code or a “route” if you use “@” to search for the specific route.
Use version control
When using Cursor, using version control - for example through Git is essential.
Especially when using agentic modes, there is a good chance that things will go wrong. While you can restore to a certain checkpoint in memory, this doesn’t always work. So try to commit early and often, and work in a branch to protect your work.
Agent vs Ask
Cursor provides 2 main modes to work with: Ask and Agent. In the ask mode, you can ask a question. You can then optionally apply the suggested code changes to your project.
The agent mode thinks for itself and can autonomously work on a task. As a user, you are in control of sensitive aspects (like executing terminal commands) but a way to summarize the agentic approach would be that this way of working can make a change across multiple files, reason about the change, loop the results to itself, to then in the end provide a better answer to your need.
An AI agent understands the tasks intent, plans steps to solve the problem. It can decide and execute actions and adapt to the environment.
Running an MCP server can provide an extra edge to the aspect of adapting to the environment (See below).
What is MCP and how can it help you?
MCP stands for Model Context Protocol.
It is a framework for communication between language models and applications.
In the past few weeks (Mid february - Beginning of March 2025) MCP became a really popular topic in AI communities. Why? MCP helps agentic processes actually do things as part of their reasoning process, like open files, execute terminal commands, or open up and inspect Figma files.
Figma MCP server
For our purposes, a Figma MCP server could prove to be very useful.
Within the Cursor settings you can set up a MCP server for Figma.
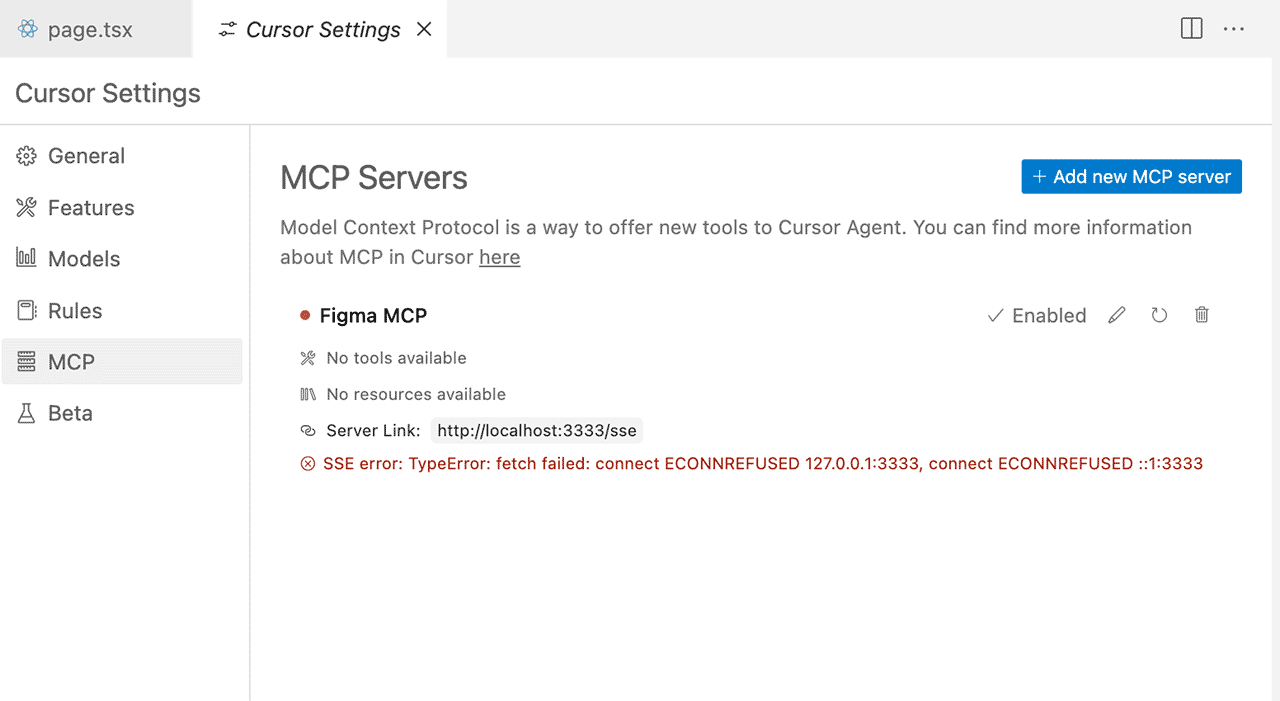
If you set this up, you basically run a local MCP server that connects to your Figma file whenever you add in a Figma link within a prompt that uses the agent mode (new from Cursor 0.46).
The Cursor prompt will now realize that it needs to connect to your Figma design and it will read the actual layer data, enabling you to generate front-end code in a much more accurate way.
An open source project that helps to set up MCP is Glips/Figma-Context-MCP .
See https://github.com/GLips/Figma-Context-MCP?tab=readme-ov-file
Other examples of MCP servers
- Supabase MCP: Make your IDE aware of the Supabase API (A tool like Lovable most likely uses this under the hood).
- Google Maps MCP: Make your IDE aware of the Google Maps API.
- Blender MCP: Connect Blender to Claude.
Final words
This is a continuously evolving topic, and at Obra, we are sure this is just the beginning.
Within this guide, we are only scratching the surface of a future process that can help us design better apps.
At Obra, we hope this guide will help you on your way when making your first steps towards prompting user interfaces and getting towards more advanced prototypes that can help you validate ideas with actual users.
If you have any feedback about the guide itself, we’d love to hear from you.
As a UI company, we focus on this day-in, day-out. If you need help, any consulting or training for your team, or need specific project help, let us know: [email protected] .